
Time Off
Configure leave types, manage leave balances, approve requests, and track the leave calendar
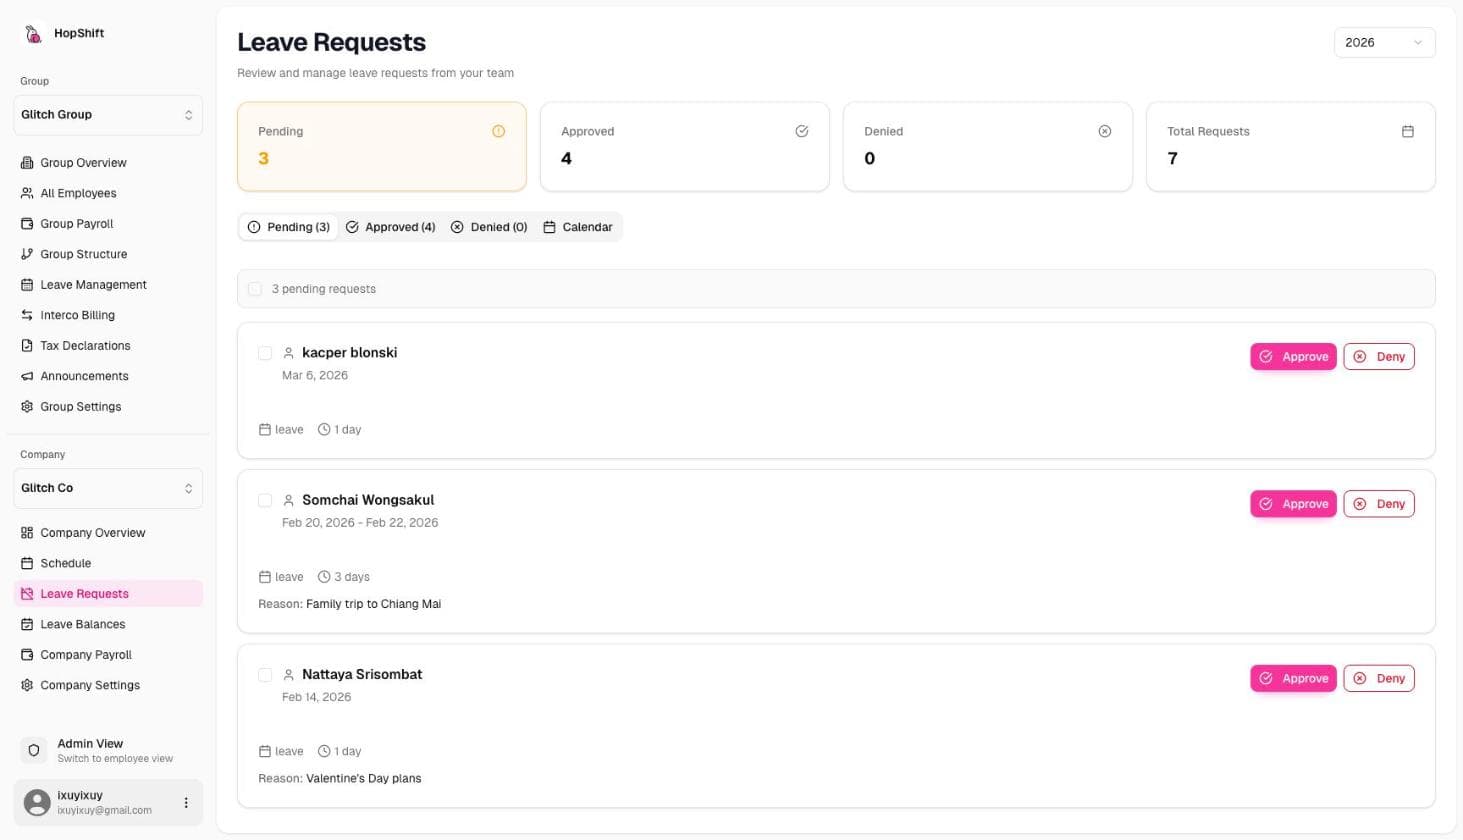
Leave management in Hopshift covers the full cycle: you configure leave types and entitlements once at the group level, employees submit requests through the self-service portal, managers or admins approve or deny them, and balances update automatically. Approved leave flows directly into the shift schedule calendar and into payroll calculations, so what you approve here affects what gets paid and what shows as covered on the roster.
How Leave is Organized
Leave in Hopshift is structured around three levels:
| Level | What it controls |
|---|---|
| Group Leave Types | Define which leave types exist and their rules (e.g. Annual Leave, Sick Leave, Maternity) |
| Employee Allocations | Each employee's entitlement for the current year |
| Leave Requests | Individual requests submitted by employees, routed for approval |
Leave types are defined once at the Group level and are shared by all companies within the group. Individual allocations are per-employee per-year.
Leave Types
Leave types define the categories of time off available in your organization. The Thai defaults are:
| Leave Type | Typical Entitlement (Thailand) | Notes |
|---|---|---|
| Annual Leave | 6-14 days (varies by policy and seniority) | Carries over based on group policy |
| Sick Leave | 30 days | Medical certificate may be required after a set number of days |
| Personal Leave | 3 days | |
| Maternity Leave | 98 days | Statutory minimum; system updates when law changes |
| Paternity Leave | 5 days | |
| Military Leave | 60 days | Statutory |
| Unpaid Leave | Unlimited | No pay; deducted from payroll |
Thailand's maternity leave law has been extended from 90 to 98 days (effective 2024). Hopshift automatically applies the current statutory minimum: you do not need to manually update entitlements when the law changes.
Viewing Leave Types
Go to Leave Management in the group sidebar, click Settings (top right) and open Leave types and rules to see all configured leave types. For each type you can see:
- Name (English, Thai, Chinese)
- Entitlement per policy (start days, yearly increase, maximum)
- Whether carry-over is allowed, and the cap
- After how many days a supporting document is required
- Eligibility (months of service before the type can be used)
Adding a Custom Leave Type
Your group may need leave types beyond the defaults (e.g. "Study Leave", "Bereavement Leave"):
- Go to Leave Management > Settings > Leave types and rules.
- Click Add leave type.
- Fill in the Code and Name (English, Thai, Chinese), then choose the reset type, counting method (working or calendar days) and pay type (paid, half-paid or unpaid). Optionally set when a document is required.
- Click Save, then click the new row's cells to set the entitlement per policy.
The new leave type is immediately available for allocation to employees. See Leave Policies for the full set of fields.
Custom leave types added by your group are not subject to automatic statutory updates. You are responsible for keeping custom types aligned with any applicable regulations.
Leave Balances
Each employee has a balance per leave type for the current leave year. The balance is calculated as:
Available = Allocated + Carry-Over + Manual Adjustments - Days TakenViewing an Employee's Balances
- Go to Employees and open the employee's profile.
- Click Leave (under the Leave & performance group).
- You'll see a year-by-year table for each leave type:
| Column | Meaning |
|---|---|
| Year | The leave year |
| Starting | Days at the start of the year |
| Rollover | Days brought forward from the previous year |
| Allocated | Days granted for this leave year |
| Used | Days used in approved leave requests this year |
| Remaining | Net balance remaining |
The Current Balance line shows the live figure. To see everyone at once, open Leave Management > Balances: one row per employee (with company and department) and one cell per leave type; hover a cell for Used and Allocated.
Manually Adjusting a Balance
Admins can add or subtract days from an employee's leave balance (e.g. to correct an error or grant exceptional leave):
- Go to Leave Management > Balances (pick a company in the filter to narrow the list).
- Click the employee's cell for the relevant leave type. To adjust several employees at once, tick them and click Adjust balance in the bar that appears.
- Enter the adjustment amount:
- Positive number to add days (e.g.
+2) - Negative number to deduct days (e.g.
-1)
- Positive number to add days (e.g.
- Enter a reason for the adjustment (stored in the audit trail).
- Click Save.
To change the allocated days themselves, open the employee profile's Leave page and click Edit Allocation.
Balance adjustments are applied immediately and are visible to the employee. Always add a clear reason: adjustments appear in the employee's leave history with the reason shown.
Annual Leave Reset
Leave balances reset at the start of the leave year. For most companies this is January 1. Balances carry over based on your group's carry-over policy set in Leave Management > Settings > Leave types and rules.
Leave Requests
Employees submit leave requests through the employee portal. Requests flow through an approval process before the leave is counted against the balance.
Request States
| State | Meaning |
|---|---|
| Pending | Submitted, awaiting approval |
| Approved | Approved by a manager or admin; balance is deducted |
| Denied | Declined; balance is not affected |
| Cancelled | Withdrawn by the employee before approval; balance is not affected |
| Cancellation requested | The employee asked to cancel an already approved request. An approver must accept it with Approve cancel (days return to the balance) or Reject cancel (the leave stands). |
Cancelling an already approved request does not free the days immediately: it becomes a Cancellation requested item that an approver must accept.
Who Can Approve
- The employee's manager (set on the employee profile), plus anyone in the employee's approver pool. Any one approver in the pool can act.
- Group admins can always approve, across all companies.
Approving or Denying a Request
- Go to Approvals > Leave (the tab shows a count of what is waiting). Managers can do the same from the Approvals screen in the mobile app.
- Each pending request shows the employee, company, leave type, dates, number of days and the reason they gave.
- Under each request is the employee's balance left for every leave type they have, with the type being requested first and highlighted: for example Annual leave: 5.5 of 12 left · Sick leave: 28 of 30 left.
- Click Approve or Deny. You can add a note; a note on a denial is shown to the employee.
- Confirm.
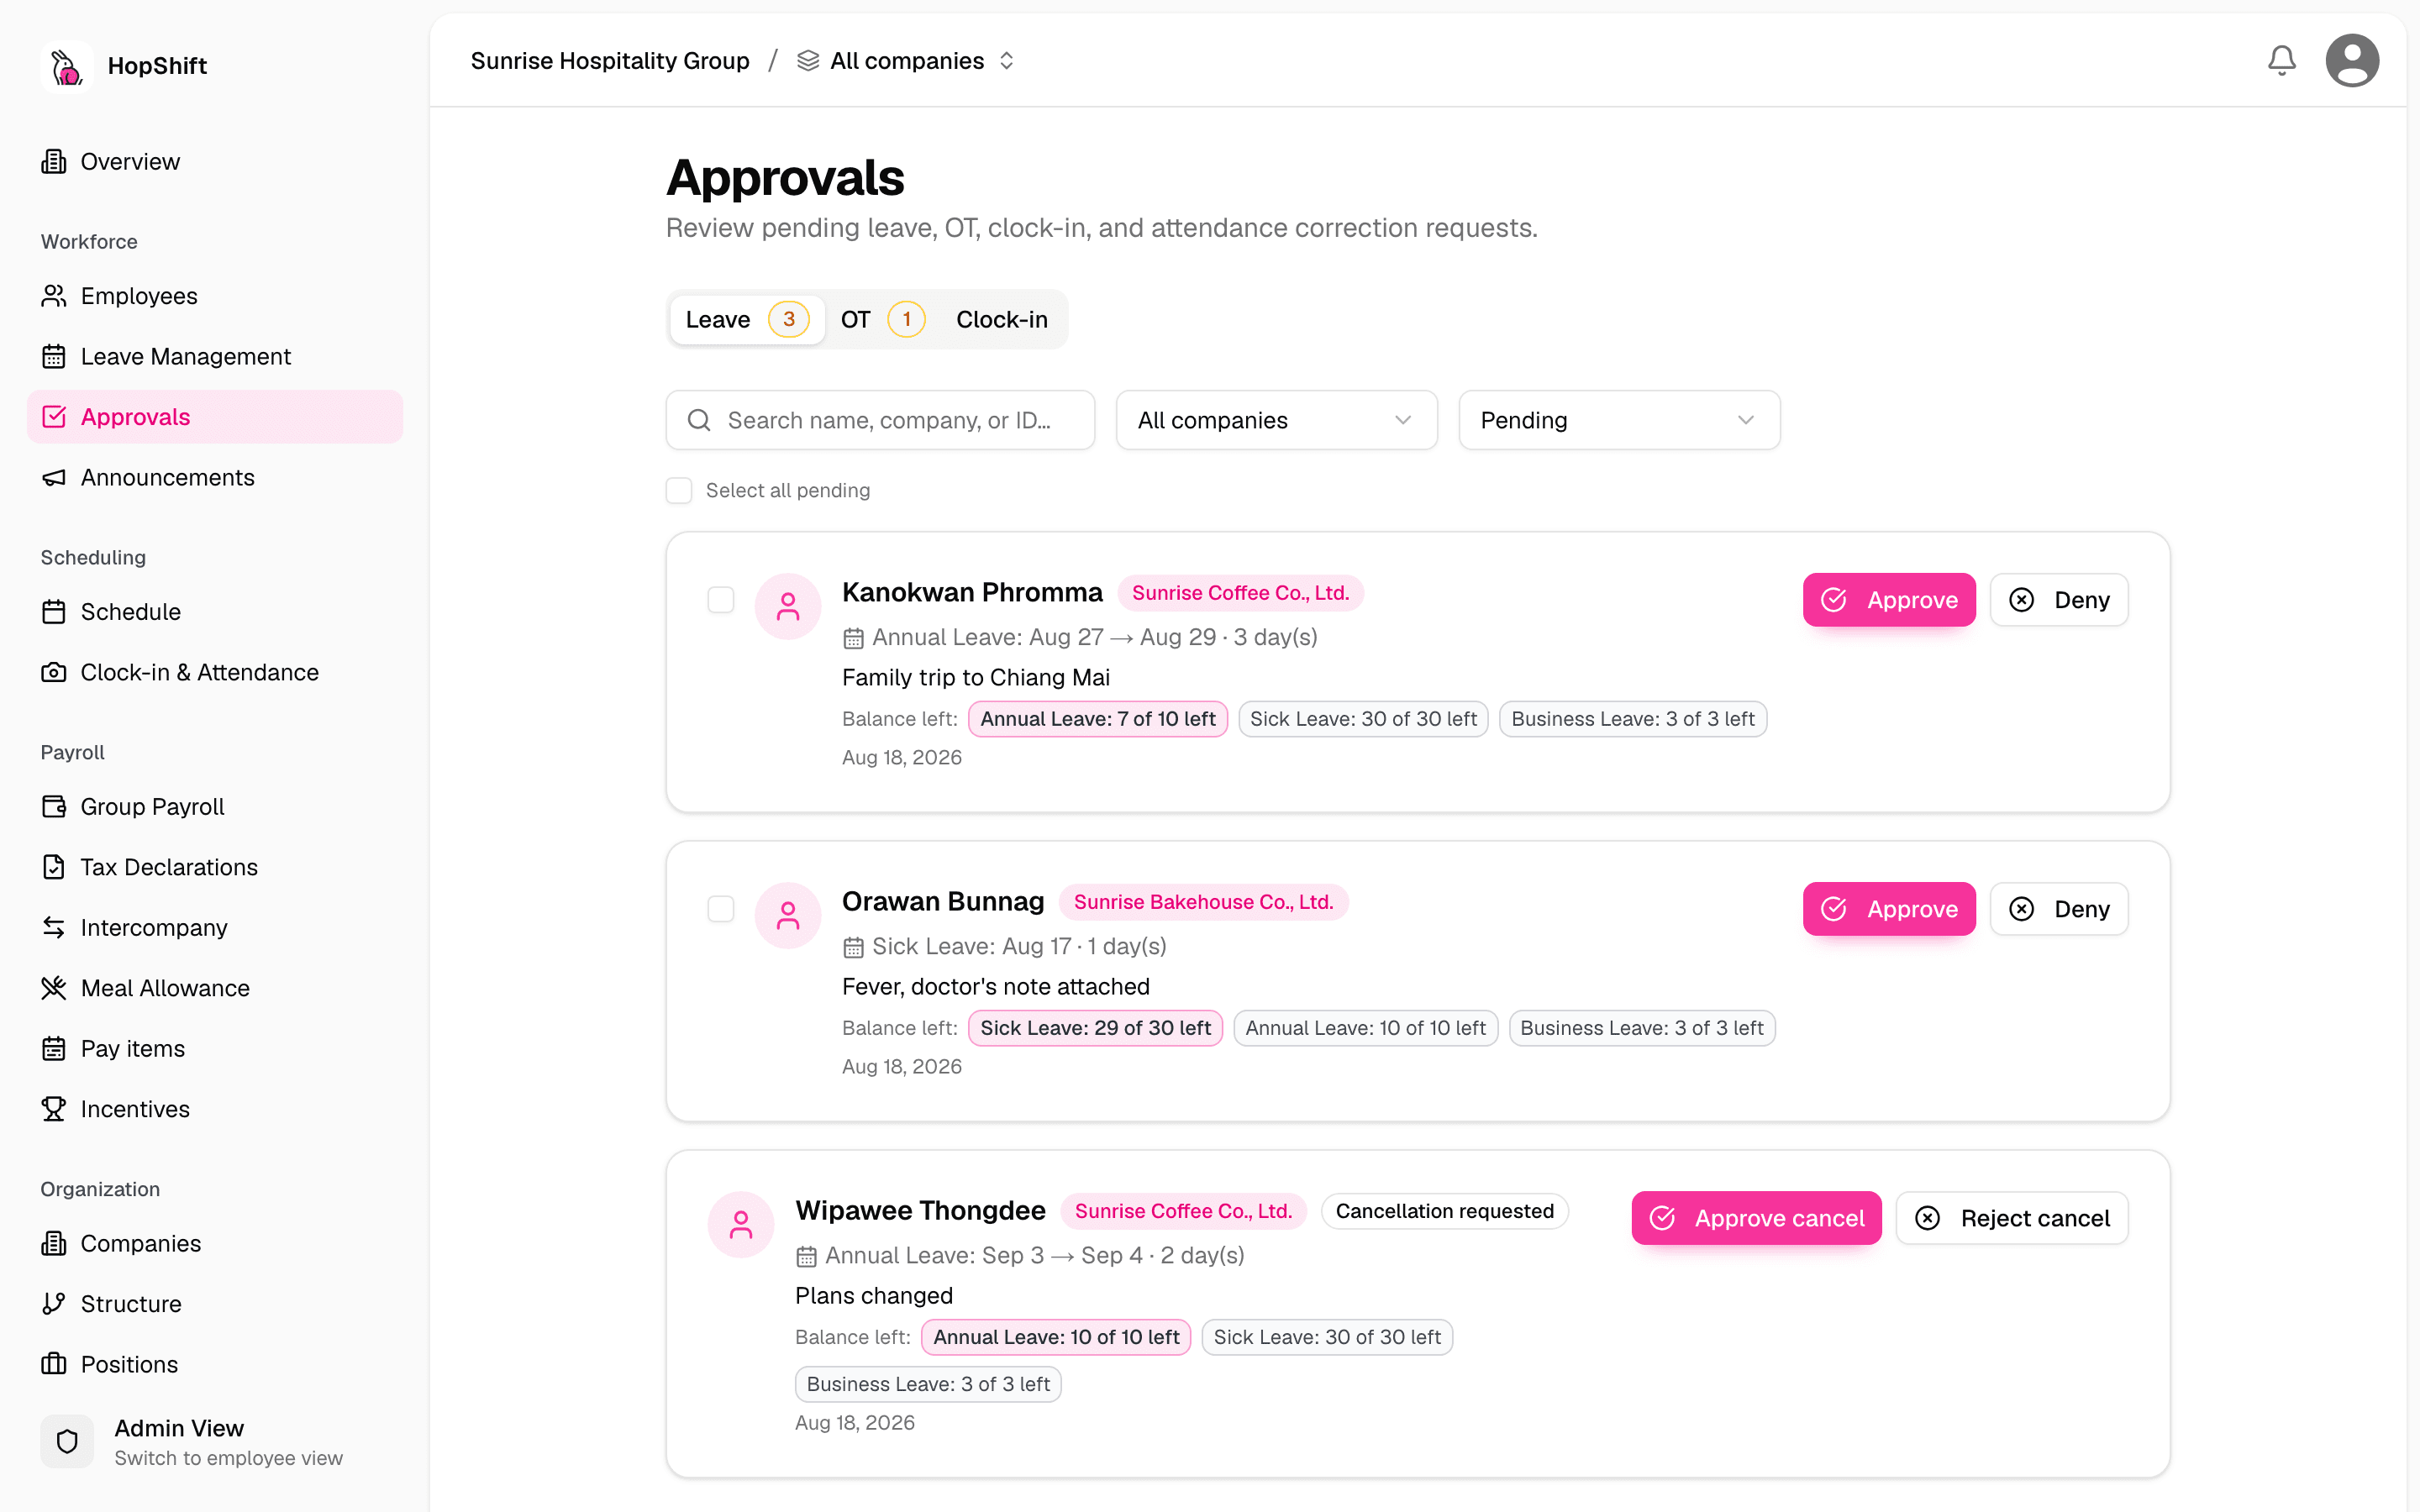
"Left" already takes pending requests into account, this one included, so it is the balance the employee will have if you approve. On a cancellation request it is the balance after the days are handed back.
To approve several at once, tick the requests; the bar at the top shows how many are selected with Approve, Deny and Clear.
When you approve a request, the days are immediately deducted from the employee's available balance. The schedule calendar is updated to show the leave block for the approved dates.
Approving with Insufficient Balance
If an employee requests more days than their available balance, Hopshift will show a warning. You can still approve the request: this puts the balance into negative. Use this when granting leave in advance of future accrual or as an exceptional case.
Submitting Leave on Behalf of an Employee
Admins can record leave for employees who forgot to submit it themselves:
- Go to Leave Management > Requests.
- Click Submit on behalf. The dialog is titled "Submit leave on behalf of an employee".
- Select the employee.
- Fill in the leave type, dates, and any notes.
- Click Submit and approve.
The request is saved as approved straight away and stamped as a backfill in the audit trail. The balance is deducted immediately.
The Leave Calendar
On Leave Management > Requests, click the Calendar tab (the other tabs are Pending, Approved and Denied) to see a visual overview of team leave; use the company filter to narrow it to one company.
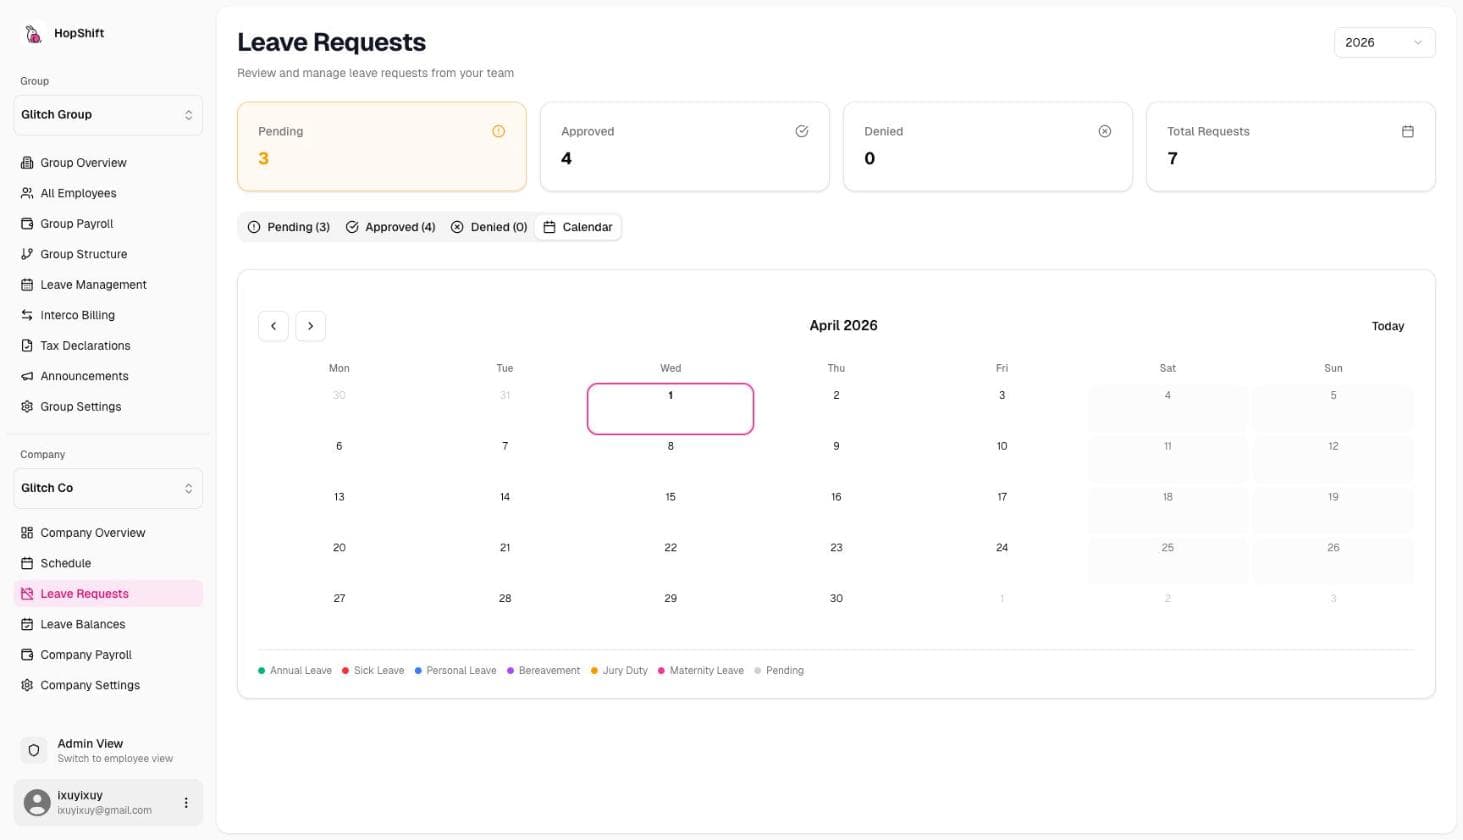
The calendar shows:
- Approved leave blocks for all active employees
- Public holidays
- Which employees are off on any given day
This view is useful for managers planning shift coverage: you can quickly see if there is a period where too many employees are off simultaneously.
Minimum Staffing Conflicts
Requests are only blocked automatically when a Maximum Staff on Leave limit is set under Company Settings > Leave > Coverage Requirements. Otherwise use the calendar to spot conflicts before approving overlapping requests.
Public Holidays
Public holidays appear on the leave calendar and schedule calendar. For leave types counted in working days, they do not count against an employee's leave balance.
Viewing and Adding Public Holidays
Go to Leave Management > Public Holidays to see the current list. Click Add Thailand 2026 Holidays to load the official Thai list for the year, or Add Holiday to add a single date (e.g. a company anniversary or a local event): enter the date and name and click Save.
Public holidays are configured once for the whole group and apply to every company in it.
Leave History
Every leave request (approved, denied, or cancelled) is stored in the employee's leave history. To view it:
- Open the employee profile and click Leave.
- Each year's table lists the requests taken, with dates, type and status.
- Use Add Historical Leave to record leave taken before the employee was on Hopshift.
Across the group, the Requests tab's Approved and Denied views list all past requests. To export balances for all employees, click Export on Leave Management > Balances; it downloads an Excel file.
Leave and Payroll
Leave records feed directly into payroll calculations:
- Paid leave (Annual, Sick, Personal, etc.): Employee receives full pay; the days are counted as paid working days in the payroll run.
- Unpaid leave: Deducted from the employee's pay. The number of unpaid days is visible in the payroll run detail.
Always finalize leave approvals before running payroll for the period. Unapproved leave requests that span the payroll period may not be correctly reflected if they are approved after the payroll run is finalized.
Notifications
When a leave request changes state, Hopshift sends notifications:
| Event | Who is notified |
|---|---|
| Employee submits request | The employee's approvers |
| Request is approved | Employee |
| Request is denied | Employee (with reason) |
| Request is cancelled by employee | The employee's approvers |
Admins can see their notifications on the company Notifications page in the sidebar.