
Adding an Employee
How a group admin creates a new employee record across any company in the group
As a group admin you can create employees for any company in your group from a single place: the Employees page. You do not need to switch company context first.
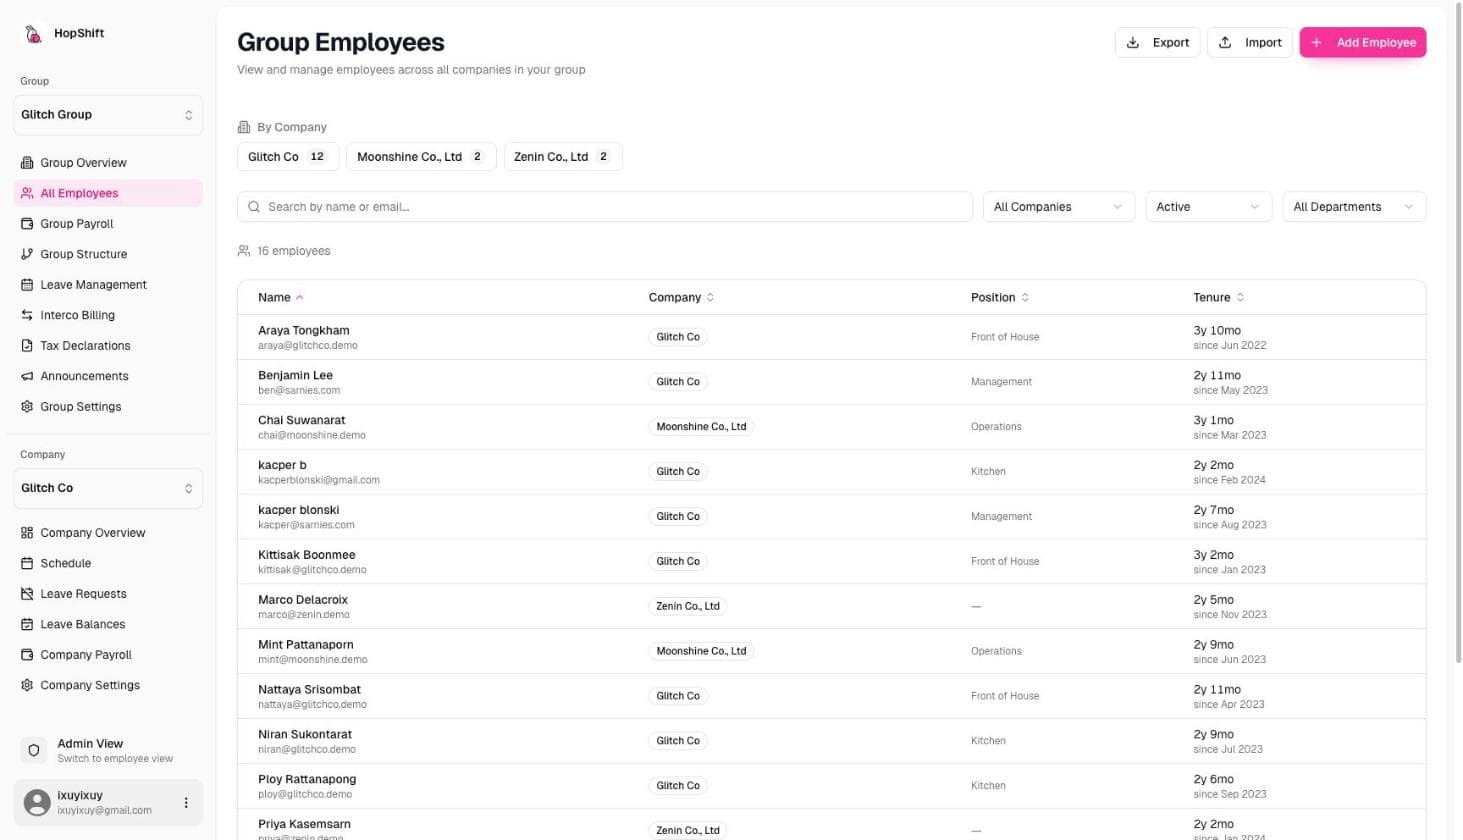
Opening the form
- In the left sidebar, under Workforce, click Employees.
- Click the Add Employee button (top-right of the page).
The Add Employee dialog opens. It collects what is needed to get the employee into payroll, scheduling, and leave. Anything you skip can be added afterwards in the employee's profile.
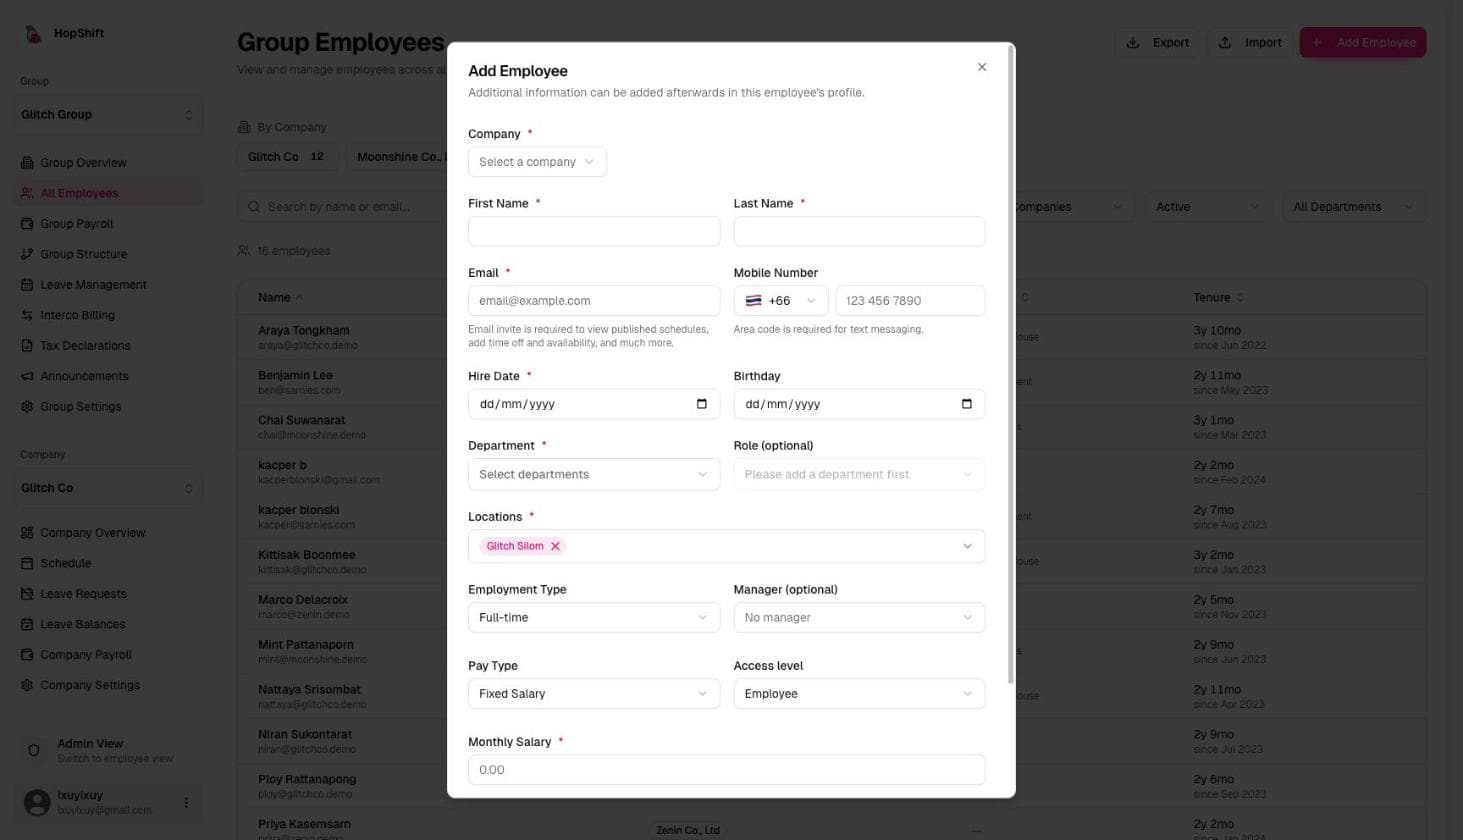
Required fields
These fields must be filled before you can save the employee:
| Field | Notes |
|---|---|
| Company | Which company within your group this employee belongs to. This determines their payroll entity, leave policies, and which schedules they appear in. |
| First Name | Legal English first name. |
| Last Name | Legal English last name. |
| Used for login, invite, and notifications. Must be unique across the company. | |
| Hire Date | The employee's official start date. Affects leave accrual, payroll proration, and probation tracking. |
| Department | Assigns the employee to a business function (e.g. Kitchen, Service, Finance). |
| Position | The job (e.g. Barista, Head Chef). Positions belong to a company and decide the leave policy. |
| Location(s) | Which outlet(s) the employee works at. At least one is required for scheduling and clock-in. |
Department, Position and Location are required, but you can create a missing one without leaving the form using Add Department, Add Position or Add Location.
Salary is not required to save the form. Only nonsense values (zero or negative) are rejected. Payroll will flag the employee as not ready until a pay amount exists, so fill it in now if you know it.
Employment details
These fields are shown in the main form and are usually filled at creation time:
| Field | Default | Notes |
|---|---|---|
| Hire Date | - | Required. See above. |
| Birthday | - | Optional. Recommended for all employees. |
| Employment Type | Full-time | Full-time, Part-time, Contract, or Intern. Affects leave entitlements and payroll calculations. |
| Manager | None | Sets who approves this employee's leave requests. Select from existing employees in the same company. |
| Pay Type | Salary | Salary (monthly), Hourly, or Daily. |
| Monthly Salary / Hourly Rate / Daily Rate | - | The amount for the selected pay type. |
| Access Level | Employee | Controls what the employee can see and do in the app: Employee, Manager, or Admin. |
Thai payroll compliance fields
For companies based in Thailand, a Payroll & Compliance (Thailand) section appears automatically when you select a Thai company. It opens by default because two of these fields are needed before payroll can be finalized.
| Field | Blocks payroll if missing | Notes |
|---|---|---|
| National ID Number | Yes | 13-digit Thai national ID (บัตรประชาชน). Enter digits only: formatting is automatic. |
| Gender | Yes | Male, Female, Non-binary, or Prefer not to say. Written to the SSO 1-10 report. |
| Birthday | No | Not used by PND1 or SSO 1-10. |
| Title (Thai) | No | นาย / นาง / นางสาว: appears on Thai government documents. |
| First Name (Thai) | No | Appears on PND1 and SSO filings. |
| Last Name (Thai) | No | Appears on PND1 and SSO filings. |
| Nationality | No | Defaults to Thai for Thai companies. |
| Thai address | No | Appears on PND1. |
None of these are required to save the form. If National ID is empty, the form shows a notice: "Compliance details can be added later. This employee cannot be included in payroll finalization until National ID and gender are filled in."
Do not type placeholder values into National ID, birthday, or salary to get past the form. Leave them empty; the payroll screens will show exactly what is missing, and finalization only blocks on National ID and gender.
Optional fields
These can be left blank at creation and filled in later via the employee's profile:
- Nickname: shown informally in schedules
- Mobile Number: area code required
- Bank account details: required before disbursing salary, but not needed to create the profile
- SSO Number: for Thai social security registration
- Emergency contact: name, phone number, and relationship
Send invite email
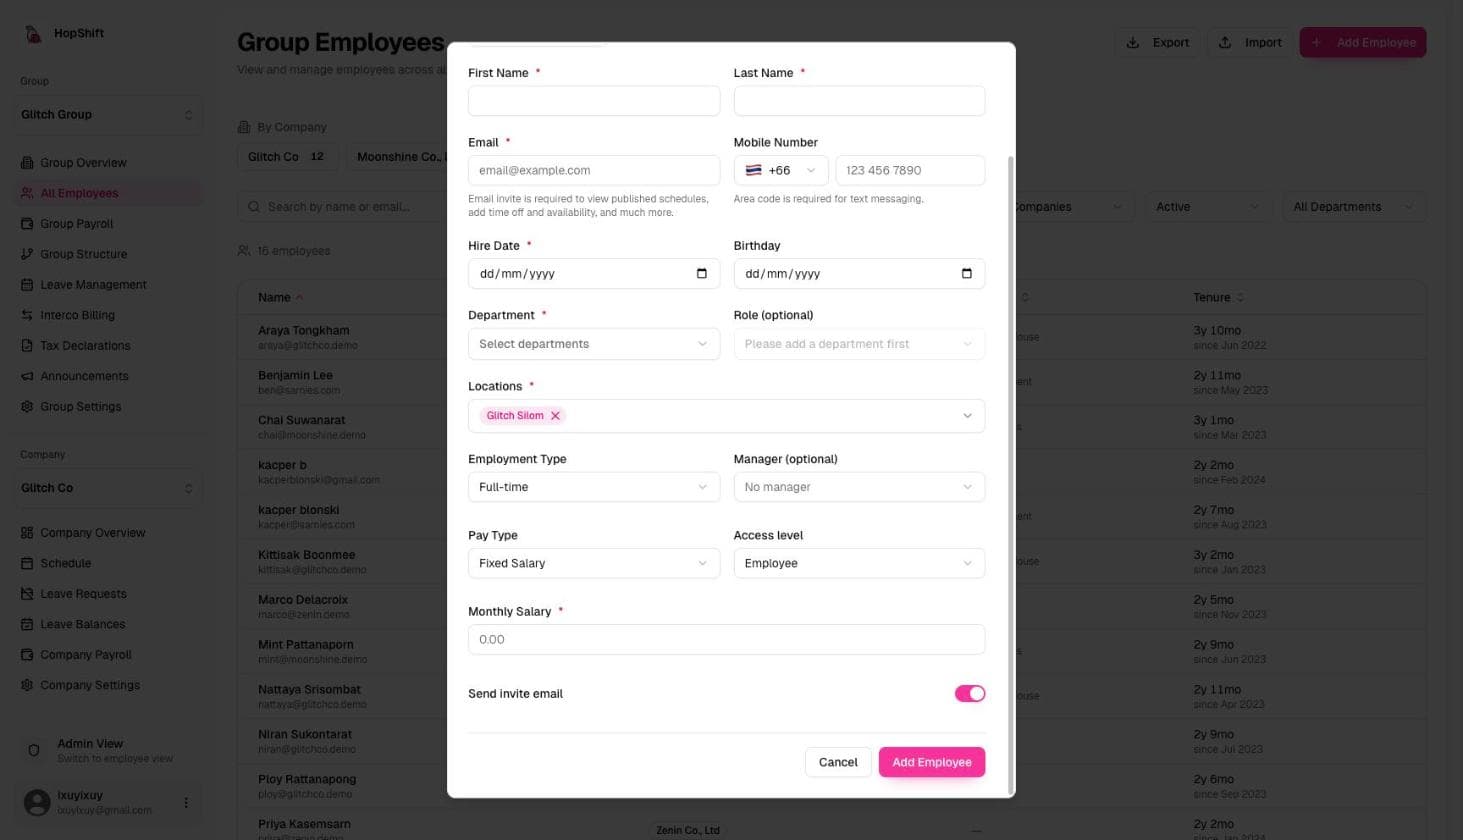
At the bottom of the form, the Send invite email switch is on by default. When enabled, Hopshift emails the employee a sign-in link; there is no password to set.
Turn this off if the employee is not ready to access the system yet (e.g. they start in several weeks, or you are importing historical records). You can invite them later from the employee list or their profile; see Inviting Employees.
After saving
Once you click Add Employee, the employee record is created immediately and:
- They appear in the Workforce > Employees list
- They appear in the company's employee directory
- Leave accrual begins from their hire date (on the next daily allocation run)
- They can be added to payroll runs, shift schedules, and leave policies
If you sent an invite, the employee receives an email and can log in to complete their profile, set availability, and submit leave requests.
What to do next
Most of the time, the next steps after creating an employee are:
- Verify compliance fields: for Thai employees, confirm National ID and Gender are filled
- Add bank account details: open the employee profile and go to Pay & tax > Compensation (section "Wages and payment")
- Assign to a payroll run: the employee will be included automatically in the next payroll run for their company
- Set their schedule: add them to shifts from the Schedule page
Bulk importing employees
If you need to add many employees at once, use the Import function instead of adding them one by one.
- From Workforce > Employees, click Import (next to Export and Add Employee).
- The Import Assistant guides you through downloading a template, filling it in, and uploading it.
- The template supports all the fields above, including salary, hire date, national ID, and Thai names.
See Importing Employees for a full walkthrough.